Sds-hd CIFS: Difference between revisions
mNo edit summary |
mNo edit summary |
||
| Line 129: | Line 129: | ||
To connect to a network share in Windows Explorer select the control field<br> |
To connect to a network share in Windows Explorer select the control field<br> |
||
Select a drive letter to be associated with the network share and enter the network path (e.g. \\ |
Select a drive letter to be associated with the network share and enter the network path (e.g. \\lsdf02.urz.uni-heidelberg.de). Select ‘use a different identification‘, as these differ from your credential used locally. |
||
<br><br> |
<br><br> |
||
'''Username:''' BWSERVICESAD\hd_xy123 <br> |
'''Username:''' BWSERVICESAD\hd_xy123 <br> |
||
Revision as of 16:25, 20 April 2020
Using SMB/CIFS for Windows client
Attention: To access data served by SDS@hd via CIFS, You need a Service Password. Please set your Service Password under following site: https://bwservices.uni-heidelberg.de.
You can use a CIFS share from a Microsoft operating system.
Adopting Universal Naming Convention (UNC) syntax
Use Windows Explorer entering the path to the share in UNC syntax:
Examples:
\\lsdf02.urz.uni-heidelberg.de
or
\\lsdf02.urz.uni-heidelberg.de\<sv-acronym>
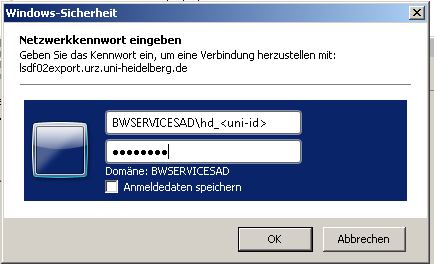
Following the input of the UNC path, a window will pop up:
Loginname: BWSERVICESAD\hd_xy123
Password: Service Password
Following authentication a new window pops up, showing the content of the share.
You can now manipulate your files as accustomed.

Creation of a network (pseudo) drive with Windows Explorer
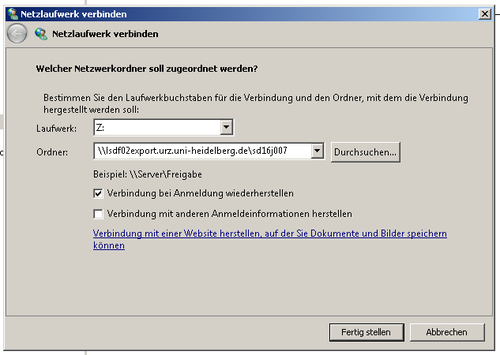
To connect to a network share in Windows Explorer select the control field
Select a drive letter to be associated with the network share and enter the network path (e.g. \\lsdf02.urz.uni-heidelberg.de). Select ‘use a different identification‘, as these differ from your credential used locally.
Username: BWSERVICESAD\hd_xy123
Password: Service Password
