BwUniCluster2.0/Jupyter
Jupyter can be used as an alternative to accessing HPC resources via SSH. For this purpose only a web browser is required. Within the website source code of different programming languages can be edited and executed. Furthermore different user interfaces and terminals are available.
Short description of Jupyter
Jupyter is a web application, central component of Jupyter is the Jupyter Notebook. It is a document, which can contain formatted text, executable code sections and (interactive) visualizations (image, sound, video, 3D views).
The Jupyter notebooks are executed in an interactive session on the compute nodes of the respective cluster. Access is via any modern web browser. Data is prepared and visualized on the server and therefore does not have to be transmitted over the network. Only the resulting text, image, sound and video data is transmitted. Starting point of a Jupyter session is the HOME directory of the user on the respective cluster.
JupyterLab is a modern user interface, within which one or more Jupyter notebooks can be opened, edited and executed. The individual notebooks can be arranged as tabs or tiled. JupyterLab is the standard user interface. Besides JupyterLab the classic notebook user interface is available, in which only one Jupyter notebook per browser tab can be opened at a time.
A Jupyter Kernel describes a separate process, in which one Jupyter Notebook is executed at a time. Different kernels are available for different programming languages or language versions.
Before a Jupyter session is started, the access authorization must be checked first. This is done via JupyterHub, where the resources are selected, for example the number of CPU cores, GPUs or the required main memory.
A detailed documentation of the Jupyter project can be found at https://jupyter.readthedocs.io.
Access requirements
To use Jupyter on the HPC resources of SCC, the access requirements for bwUniCluster 2.0 apply. Registration at https://bwidm.scc.kit.edu/ is required.
The Jupyter service is only accessible from within the network of your home organization. To access it from outside, you must first establish a VPN Connection to your home organization.
Login process
Login takes place at uc2-jupyter.scc.kit.edu. For login, KIT username, KIT password and a 2-factor authentication is required.
If you are not yet logged in to KIT, you will first be automatically redirected to the corresponding login page. Select your home organization (e.g. KIT) and press Continue. In the Login section that appears, enter your KIT username and password (not the service password). After pressing the Login button you will be redirected to the second factor query page. Enter the one-time password (e.g. from KIT Token or Google Authenticator App) and press Validate. Now you will be redirected to the JupyterHub page, after pressing the "Sign in with your KIT Account" button you are logged in.
Selection of the compute resources
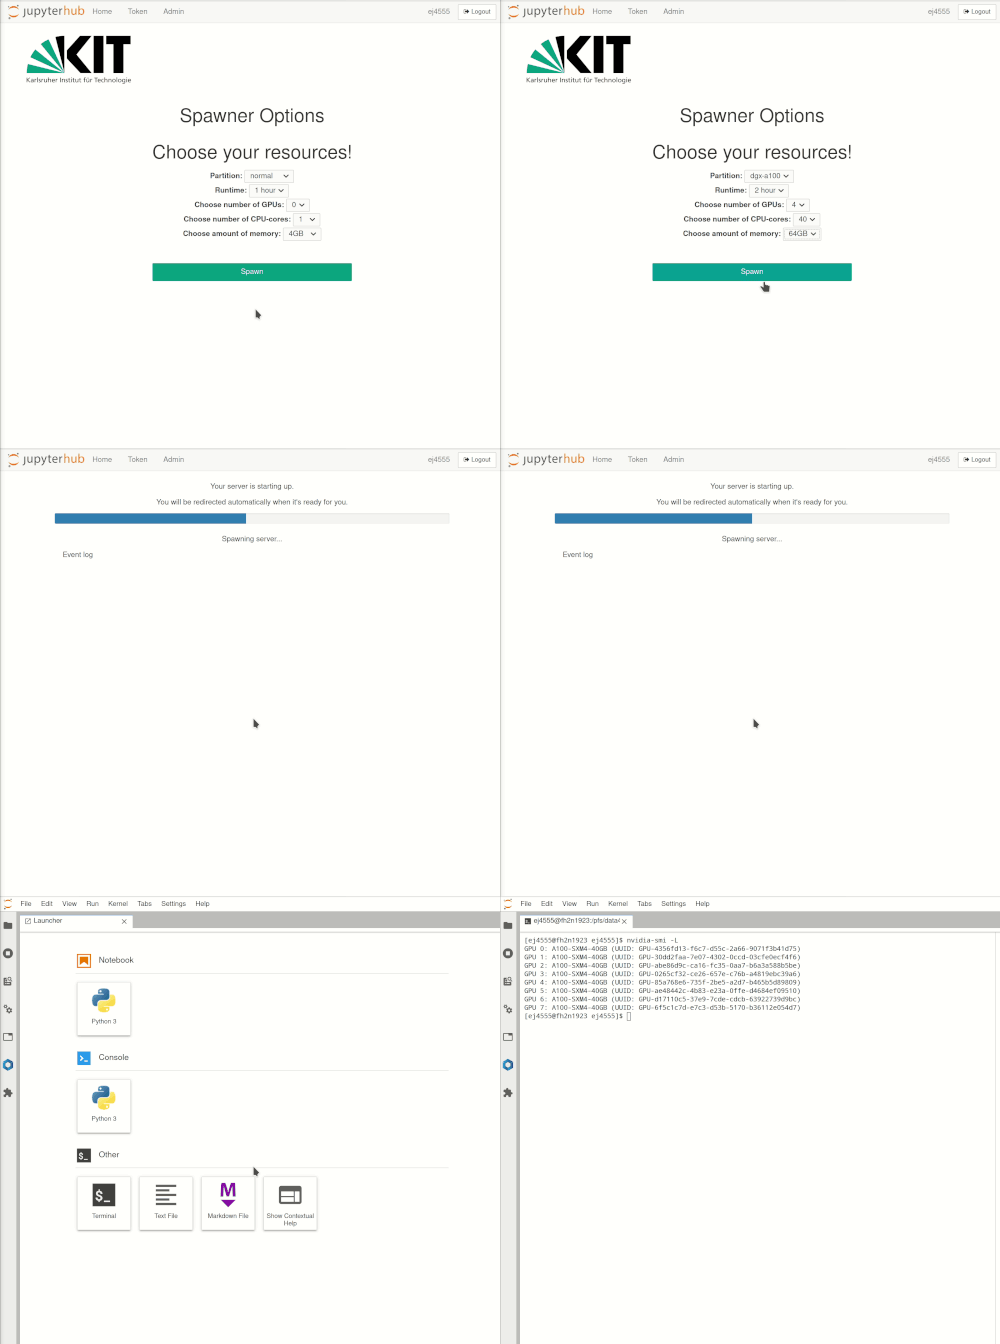
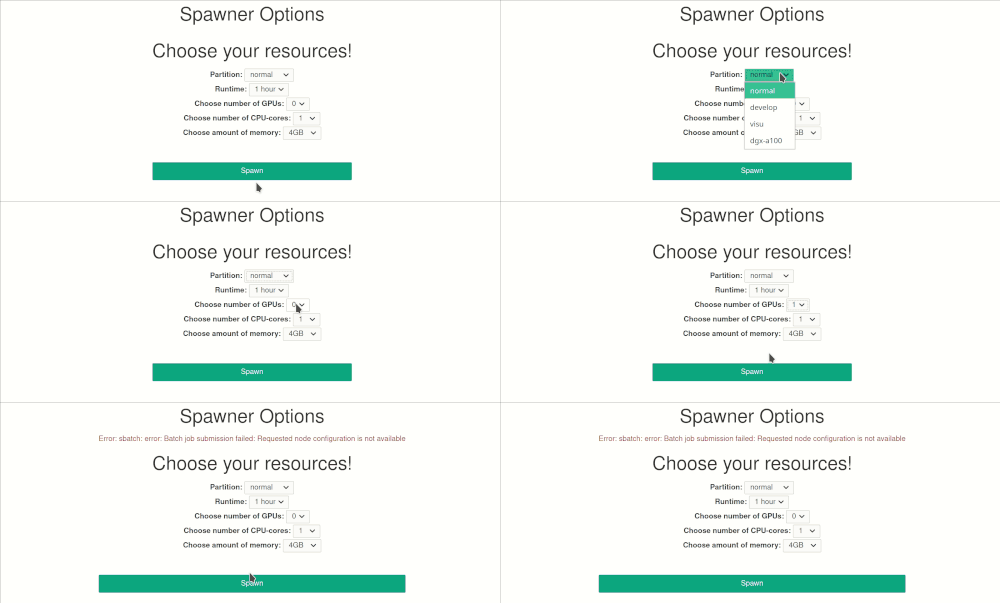
The Jupyter notebooks are executed in an interactive session on the compute nodes of the HPC clusters. Just like accessing an interactive session with SSH, resource allocation is done by the Workload Manager Slurm. The selection of resources for Jupyter is realized via drop-down menus. Only jobs with a maximum of one node are possible.
Available for selection are
- Partition/Queue
- Runtime
- Number of GPUs
- Number of CPU cores
- Amount of main memory
After the selection is made, the interactive job is started with the spawn button. As when requesting interactive compute resources with the `salloc` command, waiting times may occur. These are usually the longer the larger the requested resources are.
If by mistake an impossible resource combination is selected, an error message is displayed.
JupyterLab
JupyterLab is the standard user interface. In the following only its essential functions are briefly introduced. A detailed documentation is available at https://jupyterlab.readthedocs.io.
Menu bar
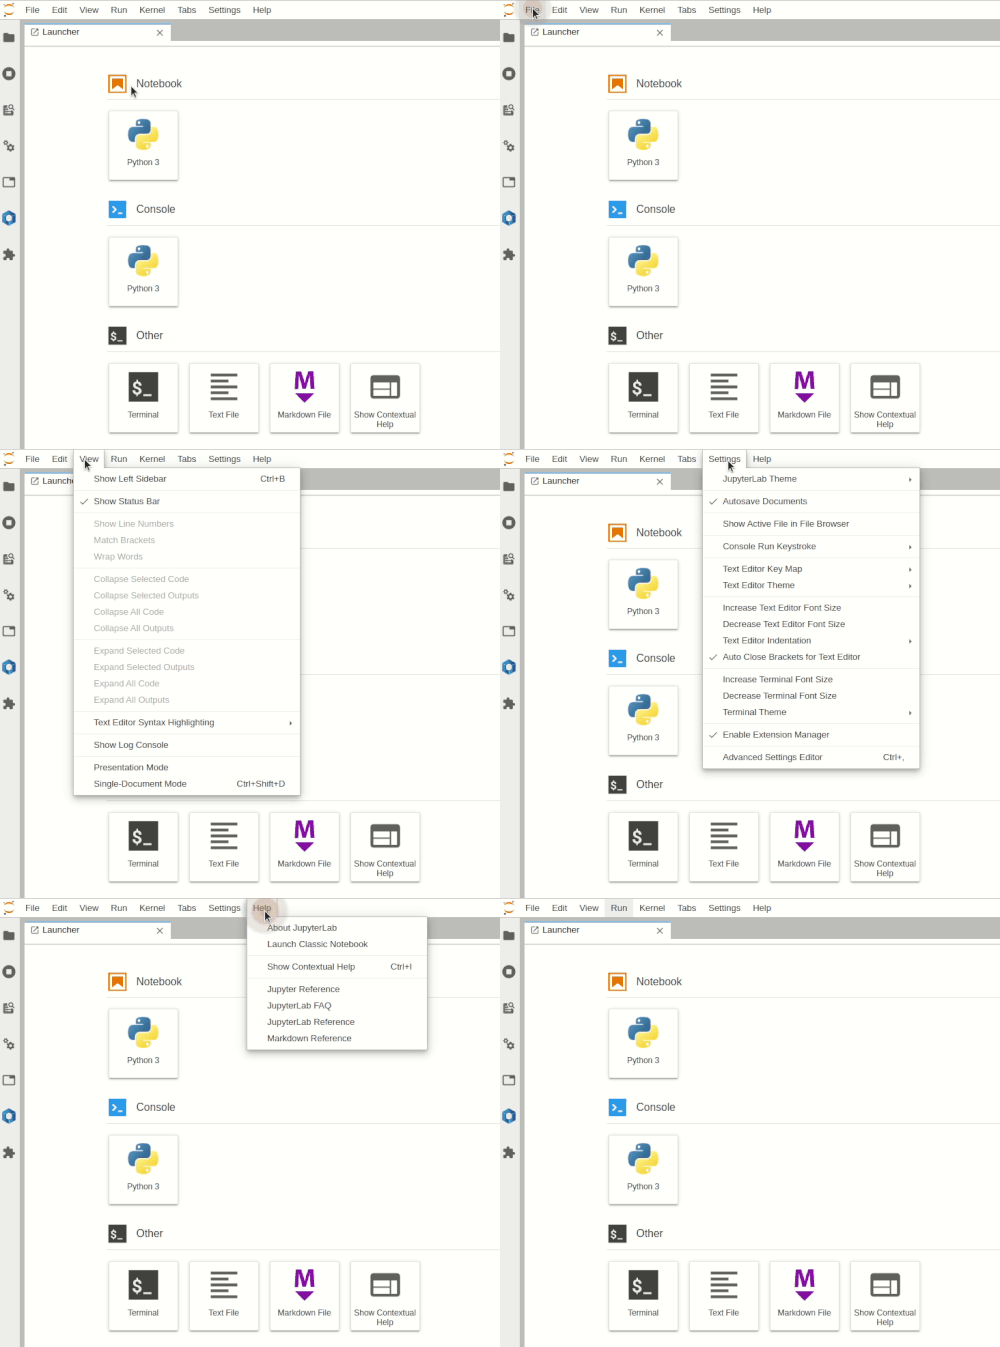
The menu bar at the upper edge of JupyterLab has higher-level menus that display the actions available in JupyterLab along with their shortcut keys. The default menus are:
- File: Actions related to files and directories
- Edit: Actions related to editing documents and other activities
- View: actions that change the appearance of JupyterLab
- Run: Actions to execute code in various activities like notebooks and code consoles
- Kernel: Actions to manage kernels that are separate processes for executing code
- Tabs: a list of open documents and activities in the Dock Panel
- Settings: general settings and an editor for advanced settings
- Help: a list of help links to JupyterLab and the kernel
Left sidebar
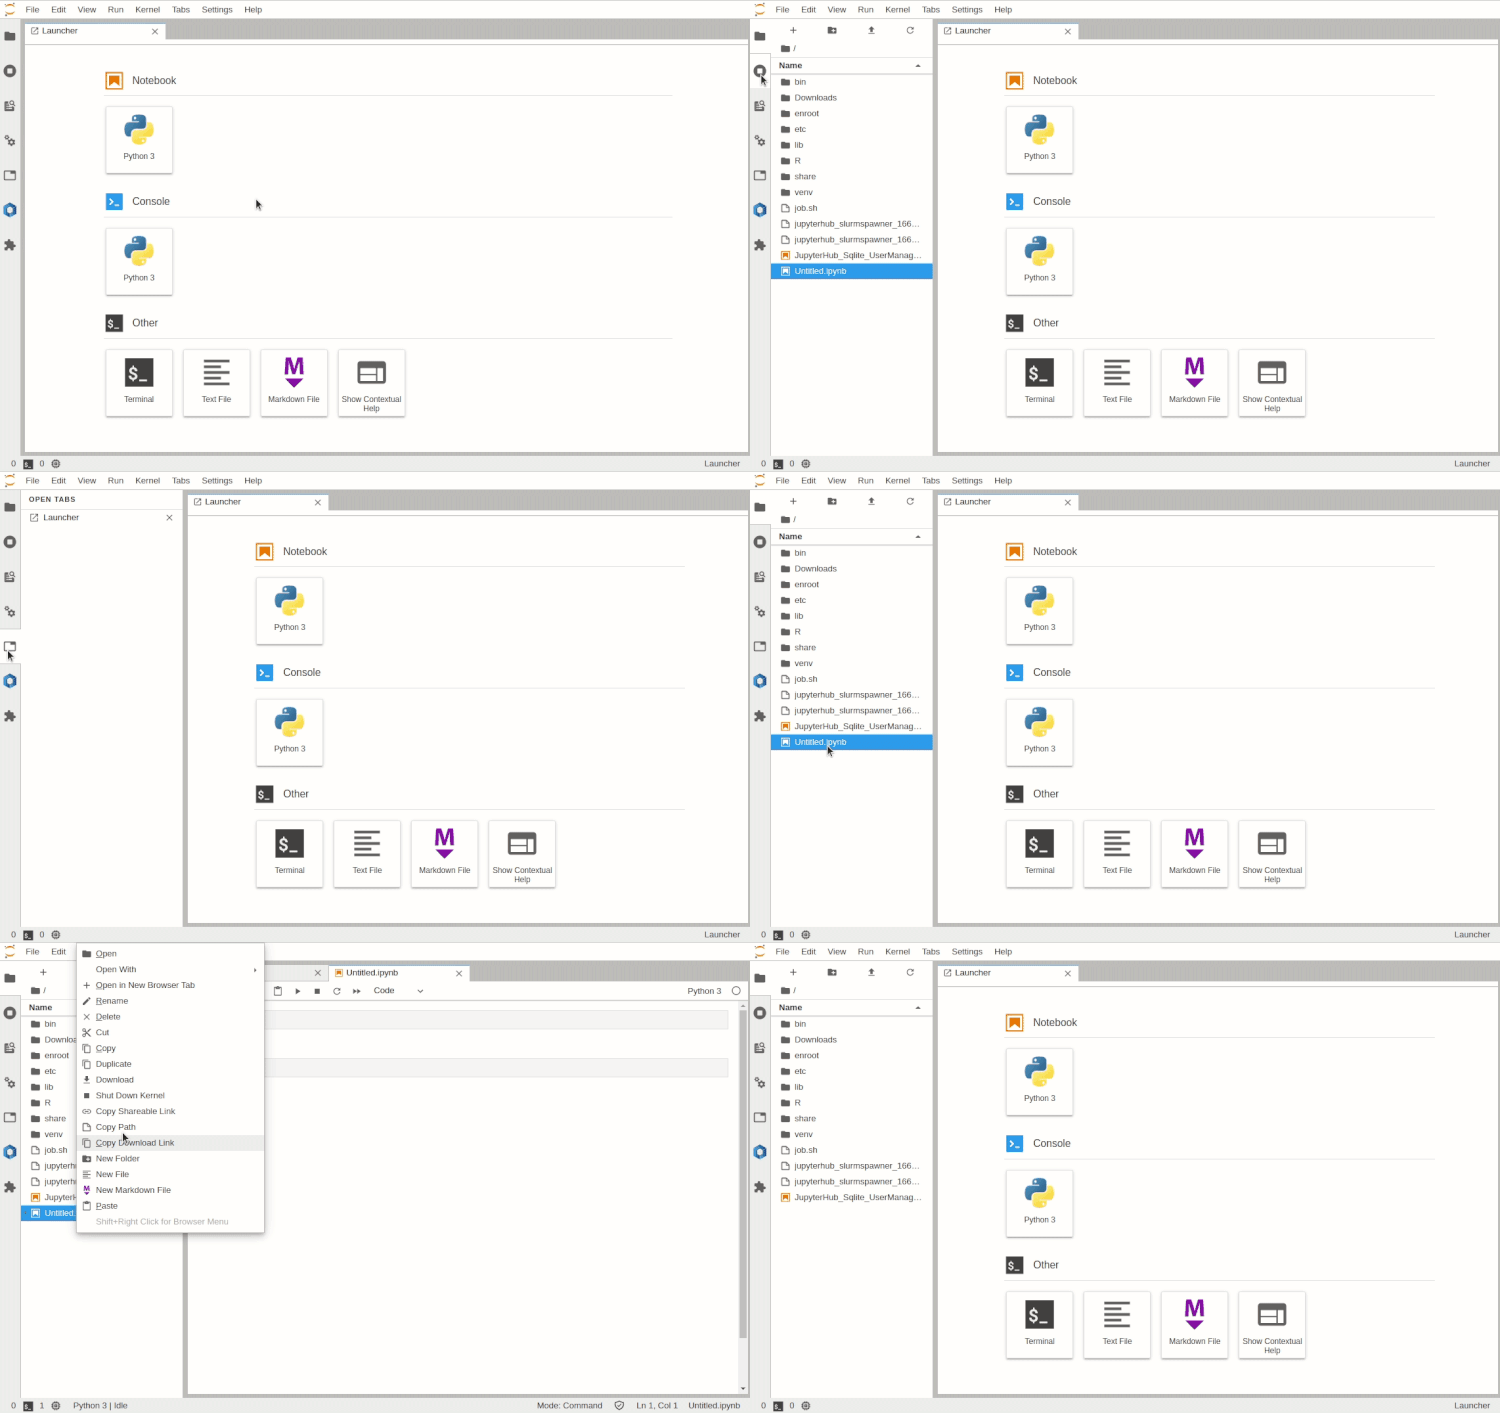
In the left sidebar there are foldable tabs. The most relevant ones are:
- File browser: Switch to directories and open files with left mouse button, context menu with right mouse button
- Running kernels: Overview of running kernels
- Command overview
- Tab Overview
- Lmod software selection: Search and load/unload Lmod software modules
Main working area
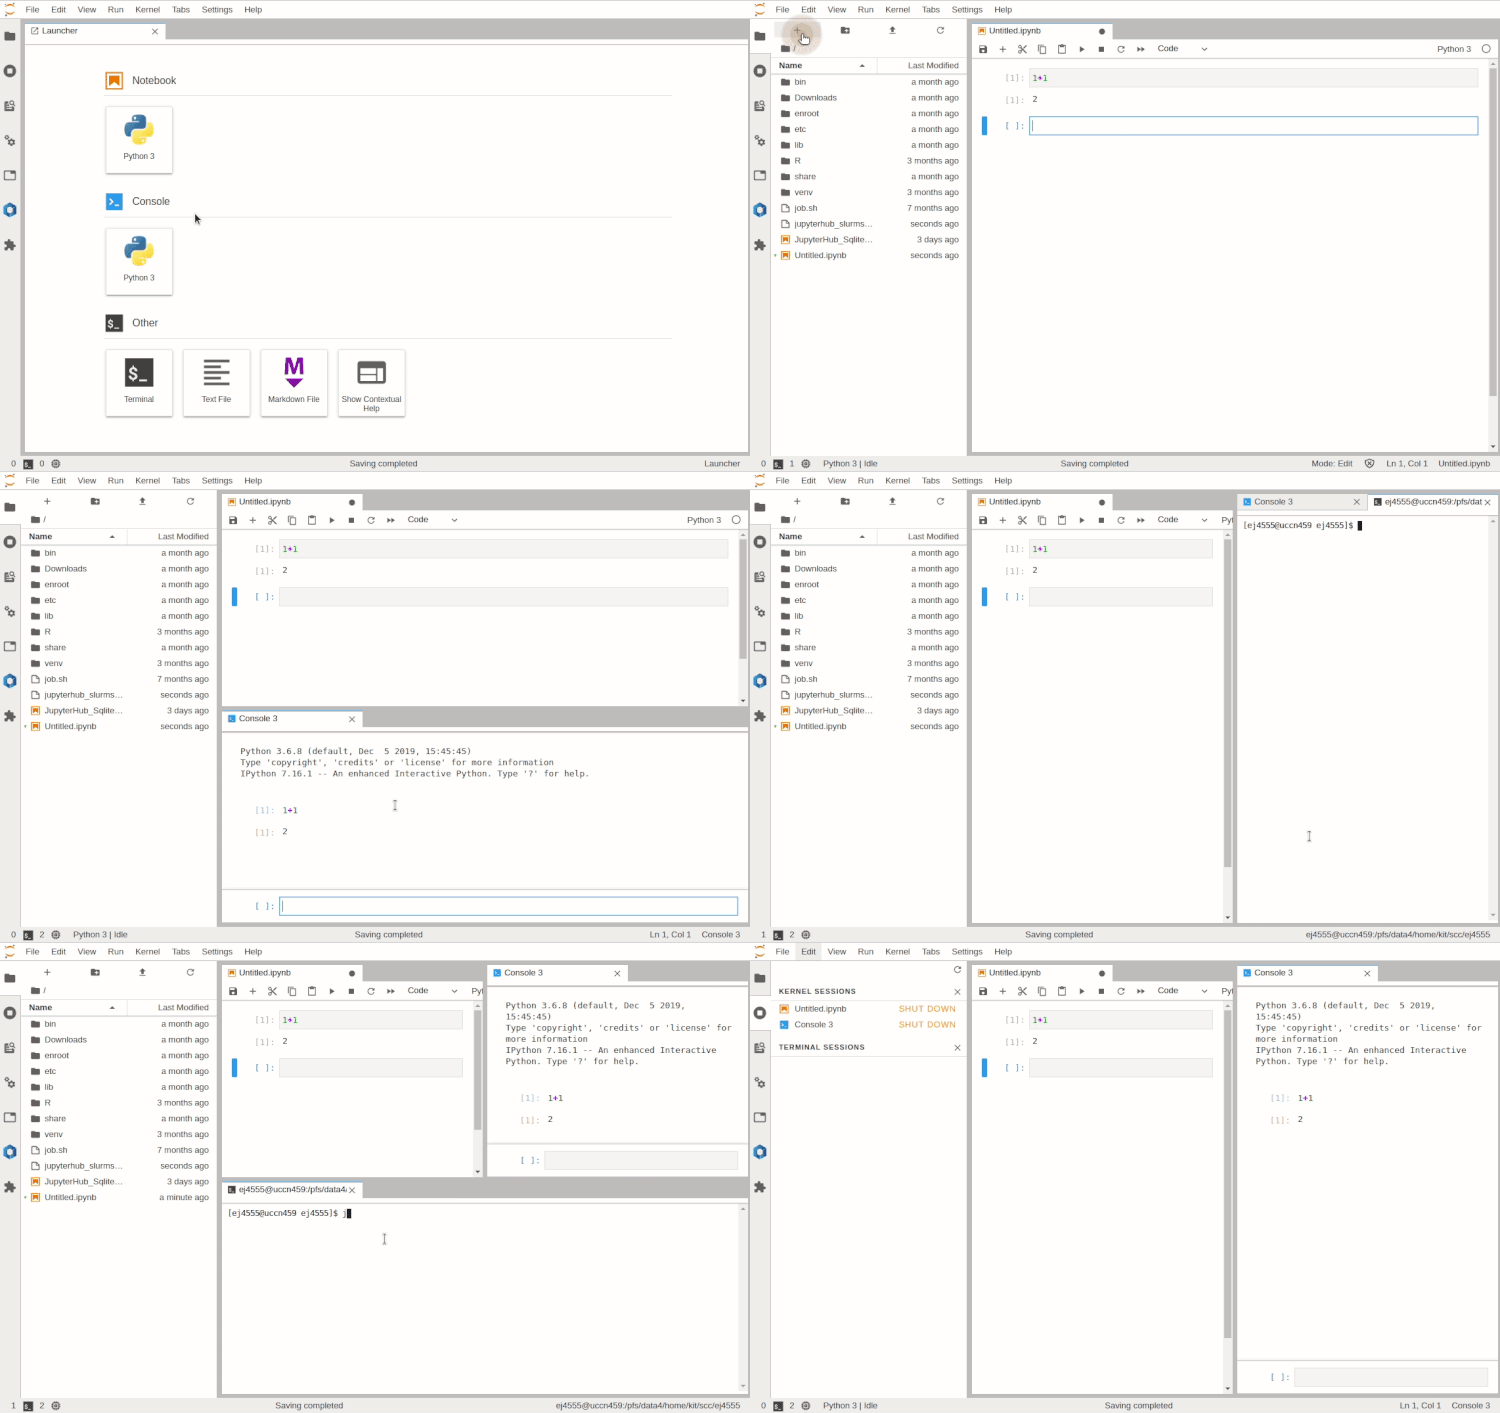
The main working area in JupyterLab allows to arrange, resize and divide documents (notebooks, text files, etc.) and other activities (terminals, code consoles, etc.) in tabs. By holding down the left mouse button, the tabs can be grabbed and repositioned.
In a new JupyterLab session the Launcher tab is opened first. It contains buttons for starting new notebooks, code consoles and other functions. When a notebook is open, a new Launcher tab can be started by pressing the plus symbol in the file browser tab of the left sidebar, by calling File > New Launcher in the upper menu bar or by the key combination Ctrl+Shift+L.
Classic Notebook
The classic Jupyter Notebook user interface offers only one open Jupyter Notebook or terminal per browser tab. From the JupyterLab user interface the classic display can be reached in the menu bar under Help > Launch Classic Notebook. Clicking on the JupyterHub logo in the upper left corner will take you back to the JupyterLab interface.
Log out
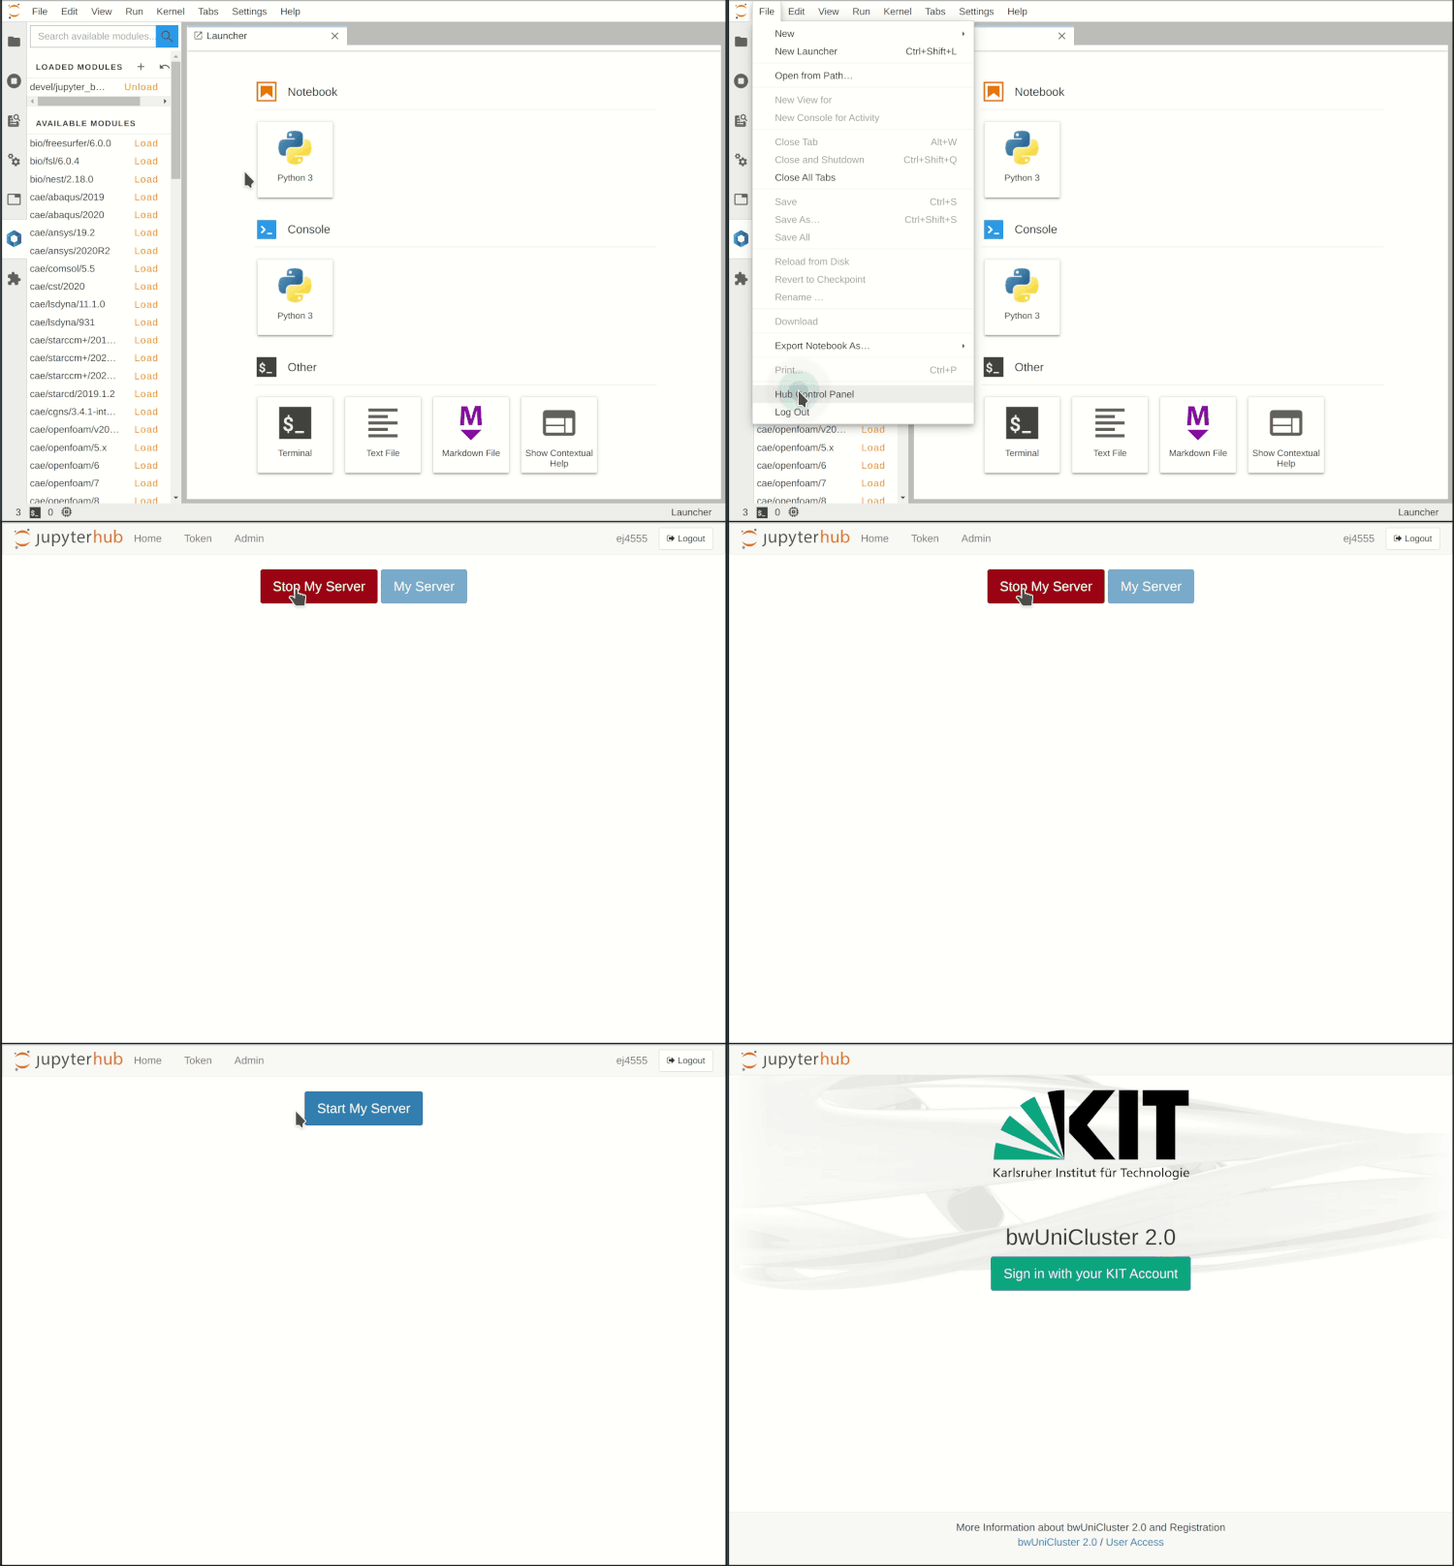
You can log out from a running Jupyter session by calling File > Log Out in the upper menu bar.
|
As long as the interactive session is running, you can re-enter it at any time. Depending on the duration of your absence, it may be necessary to re-enter your one-time password and possibly KIT password.
If you want to end the interactive session before it has reached its runtime, you can do so via the Hub Control Panel. Under File > Hub Control Panel in the upper menu bar, it is opened in a new browser tab. By pressing the Stop My Server button the session will be terminated. You can now log out using the Logout button in the upper right corner or start a new session directly using the Start My Server button, for example with a changed resource selection.
Selection of software
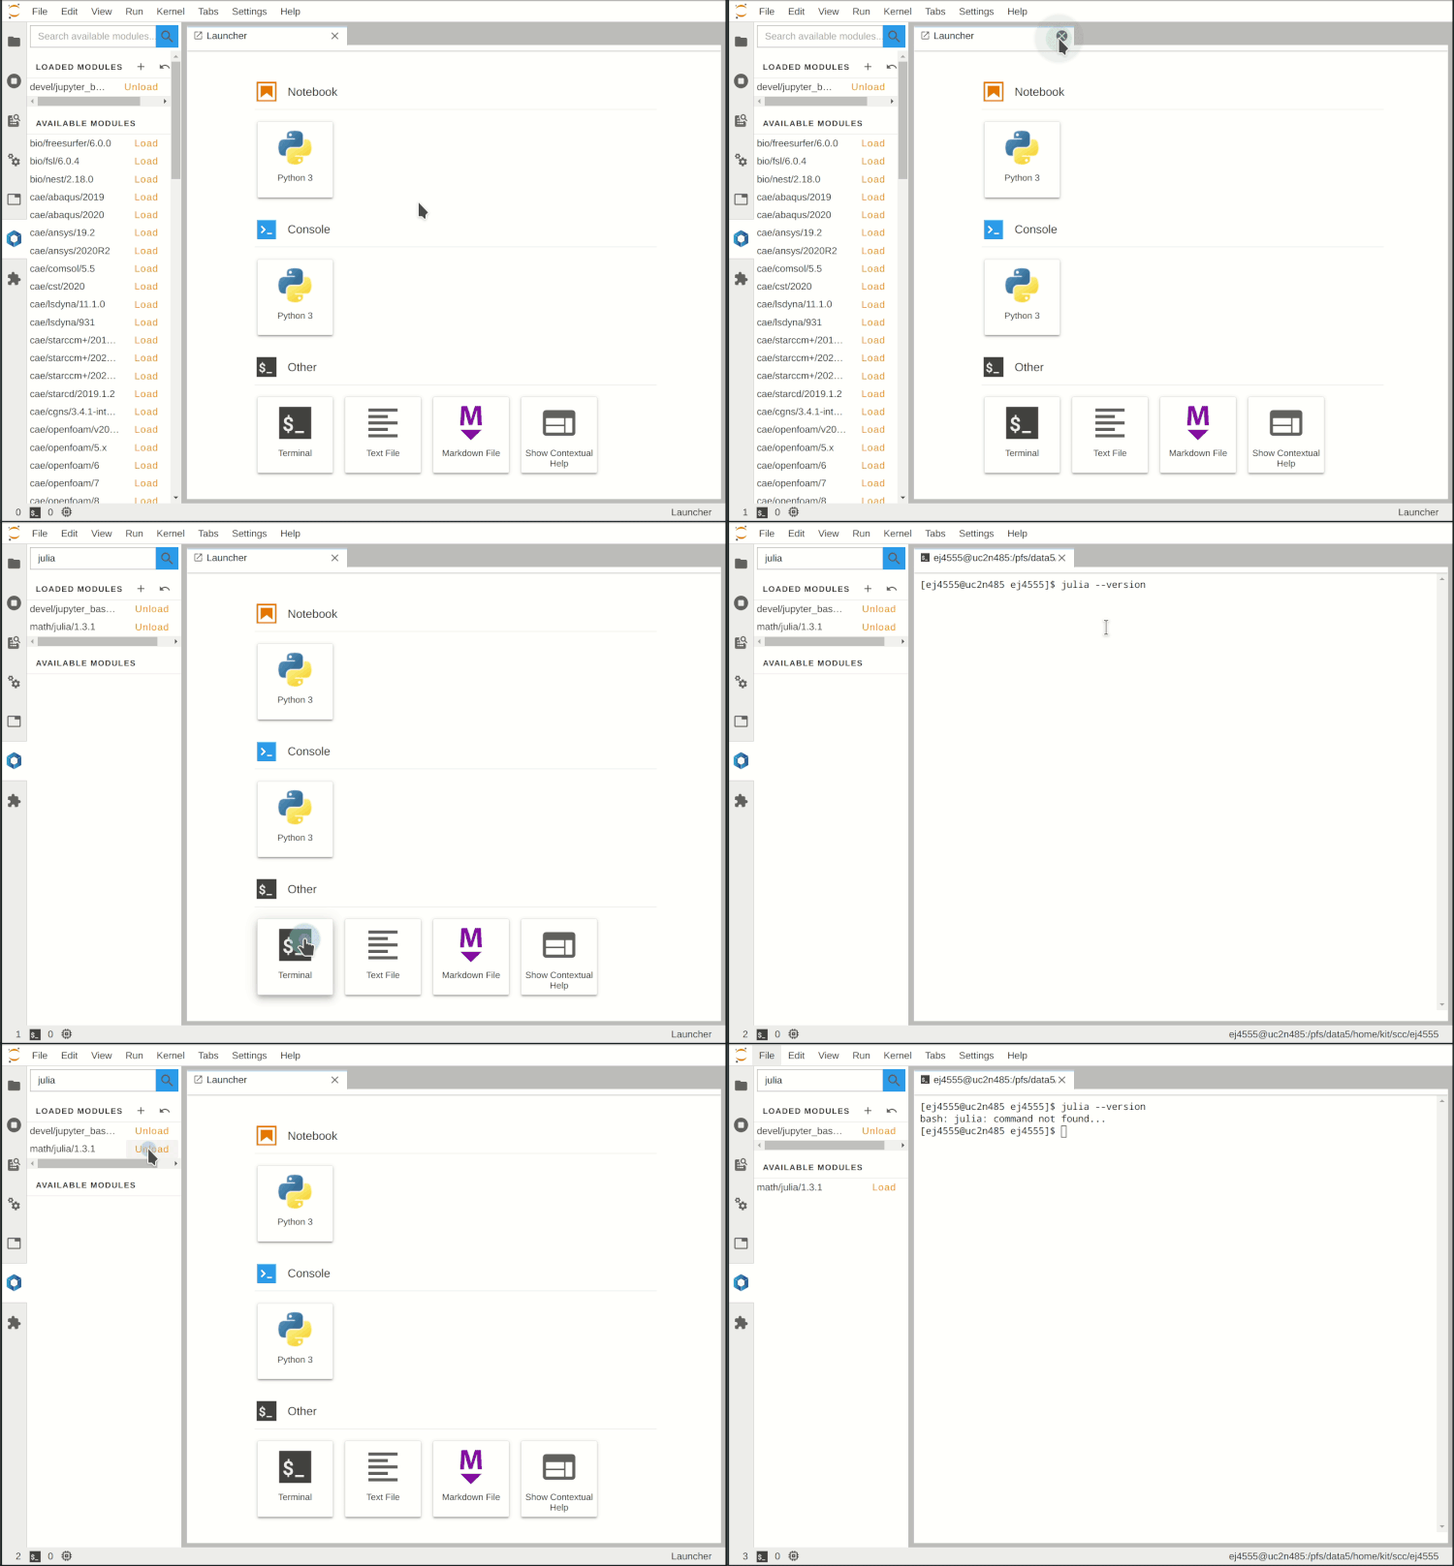
For the selection of the required Lmod software modules the corresponding tab Softwares is available in the left sidebar. The list of available modules can be narrowed down by entering the search field. The desired module is loaded by pressing the Load button. In the list with the loaded modules you can remove them with the Unload button.
|
Software Stacks for Jupyter
Currently 2 special Jupyter software stacks are available via Lmod:
- devel/jupyter_base (default at login)
- Basic installation of JupyterLab and Python, own Python modules can be installed via `pip install <packagename>`
- devel/jupyter_ml
- Preinstalled software packages for machine learning applications. Includes among others TensorFlow, Keras, Torch, MXNet, MPI4Py, Pandas, Matplotlib, SKLearn
Existing Python variants will be successively adapted for use in Jupyter. The integration of further programming languages and kernels is work in progress: Julia, R, C/C++ (cling)

