Development/ollama: Difference between revisions
No edit summary |
m (→Best Practice) |
||
| (15 intermediate revisions by 2 users not shown) | |||
| Line 1: | Line 1: | ||
Using LLMs even for inferencing requires large computational resources - currently at best a powerful GPU |
Using LLMs even for inferencing requires large computational resources - currently at best a powerful GPU - |
||
as provided by the bwHPC clusters. |
as provided by the bwHPC clusters. |
||
This page explains to how to make usage of bwHPC resources, using Ollama as an example to show best practices at work. |
This page explains to how to make usage of bwHPC resources, using Ollama as an example to show best practices at work. |
||
| Line 11: | Line 11: | ||
into the directory <code>/usr/local/bin</code>. Of course, this is '''not''' sensible. |
into the directory <code>/usr/local/bin</code>. Of course, this is '''not''' sensible. |
||
Therefore the clusters provide the [[Environment_Modules|Environment Modules]] including binaries and libraries for CPU (if available AVX-512), AMD ROCm (if available) and NVIDIA CUDA using: |
Therefore the clusters provide the [[Environment_Modules|Environment Modules]] including binaries and libraries for CPU (if available AVX-512), AMD ROCm (if available) and NVIDIA CUDA using: |
||
module load cs/ollama |
|||
More information is available in [https://github.com/ollama/ollama/tree/main/docs Ollamas Github documentation] page. |
More information is available in [https://github.com/ollama/ollama/tree/main/docs Ollamas Github documentation] page. |
||
| Line 17: | Line 17: | ||
The inference server Ollama opens the well-known port 11434. The compute node's IP is on the internal network, e.g. 10.1.0.101, |
The inference server Ollama opens the well-known port 11434. The compute node's IP is on the internal network, e.g. 10.1.0.101, |
||
which is not visible to any outside computer like Your laptop. |
which is not visible to any outside computer like Your laptop. |
||
Therefore we need a way to forward this port on an IP visible to the outside. |
Therefore we need a way to forward this port on an IP visible to the outside, aka the login nodes. |
||
{|style="background:#FEF4AB; width:100%;" |
|||
|style="padding:5px; background:#FEF4AB; text-align:left"| |
|||
[[Image:Attention.svg|center|25px]] |
|||
|style="padding:5px; background:#FEF4AB; text-align:left"| |
|||
Please note: this module started off in the Category <code>devel</code>, but has been moved to the correct category computer science, or short <code>cs</code>. |
|||
|} |
|||
== Preparation == |
== Preparation == |
||
Prior to starting and pulling models, it is a '''good idea''' to allocate a proper [[Workspace]] for the (multi-gigabyte) models |
Prior to starting and pulling models, it is a '''good idea''' to allocate a proper [[Workspace]] for the (multi-gigabyte) models |
||
and create a soft-link into this directory for Ollama: |
|||
ws_allocate ollama_models 60 |
|||
ln -s `ws_find ollama_models`/ ~/.ollama |
|||
mkdir -p /pfs/work7/workspace/scratch/es_rakeller-ollama_models/.ollama/ |
|||
ln -s /pfs/work7/workspace/scratch/es_rakeller-ollama_models/.ollama . |
|||
Now we may allocate a compute node using [[BwUniCluster2.0/Slurm|Slurm]]. |
Now we may allocate a compute node using [[BwUniCluster2.0/Slurm|Slurm]]. |
||
At first You may start with interactively checking out the method in one terminal: |
At first You may start with interactively checking out the method in one terminal: |
||
srun --time=00:30:00 --gres=gpu:1 --pty /bin/bash |
|||
Please note that on bwUniCluster, You need to provide a partition, here containing a GPU, e.g. for this 30 minute run, we may select <code>--partition=dev_gpu_4</code>, on DACHS <code>--partition=gpu1</code>. |
Please note that on bwUniCluster, You need to provide a partition, here containing a GPU, e.g. for this 30 minute run, we may select <code>--partition=dev_gpu_4</code>, on DACHS <code>--partition=gpu1</code>. |
||
Your Shell's prompt will list the |
Your Shell's prompt will list the node's name, e.g. on bwUniCluster node <code>uc2n520</code>: |
||
[USERNAME@uc2n520 ~]$ |
|||
Now You may load the Ollama module and start the server on the compute node |
Now You may load the Ollama module and start the server on the compute node and make sure using <code>OLLAMA_HOST</code> that it serves to the external IP address: |
||
module load cs/ollama |
|||
| ⚫ | |||
ollama serve |
|||
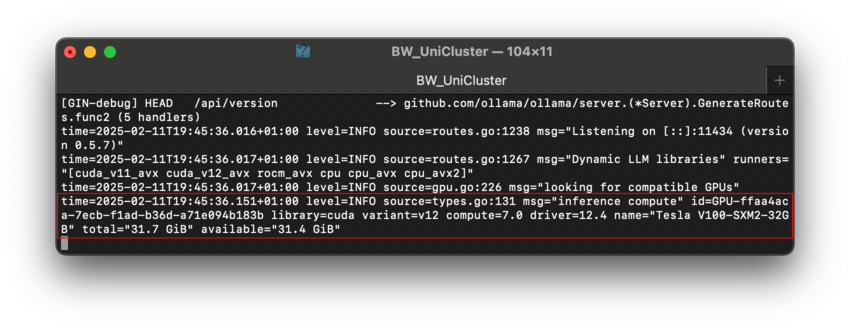
You should be able to see the usage of the accelerator: |
|||
[[File:ollama_gpus.png|850x329px]] |
|||
| ⚫ | |||
| ⚫ | |||
== Accessing from login nodes == |
|||
| ⚫ | |||
| ⚫ | |||
| ⚫ | |||
| ⚫ | |||
export OLLAMA_HOST=uc2n520 |
|||
| ⚫ | |||
On the previous terminal on the compute node, You should see the model being downloaded and installed into the workspace. |
On the previous terminal on the compute node, You should see the model being downloaded and installed into the workspace. |
||
Of course developing on the login nodes is not viable, therefore You may want to forward the ports. |
Of course developing on the login nodes is not viable, therefore You may want to forward the ports. |
||
{|style="background:#dedefe; width:100%;" |
|||
|style="padding:5px; background:#dedefe; text-align:left"| |
|||
[[Image:Info.svg|center]] |
|||
|style="padding:5px; background:#dedefe; text-align:left"| |
|||
On GPUs with 48GB VRAM like NVIDIA L40S, you may want to use the 70b model of Deepseek, i.e. <code>ollama pull deepseek-r1:70b</code> and amend the below commands accordingly. |
|||
|} |
|||
== Port forwarding == |
== Port forwarding == |
||
| Line 55: | Line 75: | ||
Of course, You may want to '''locally on Your laptop'''. |
Of course, You may want to '''locally on Your laptop'''. |
||
Open another terminal and start the Secure shell using the port forwarding: |
Open another terminal and start the Secure shell using the port forwarding: |
||
ssh -L 11434:uc2n520:11434 USERNAME@bwunicluster.scc.kit.edu |
|||
Your OTP: 123456 |
|||
Password: |
|||
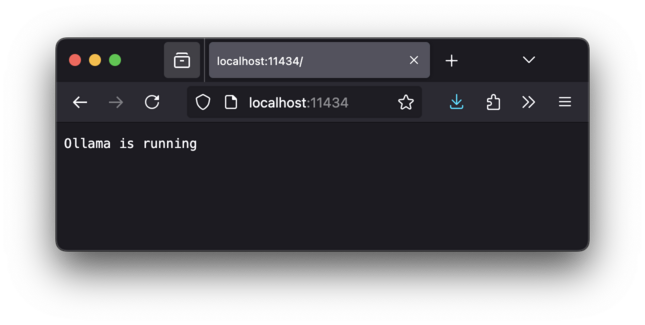
You may check using whether this worked using Your local browser on Your Laptop: |
You may check using whether this worked using Your local browser on Your Laptop: |
||
| Line 63: | Line 83: | ||
== Local programming == |
== Local programming == |
||
Now that You made sure You have access to the compute nodes GPU: |
Now that You made sure You have access to the compute nodes GPU, you may develop on your local system: |
||
python -m venv ollama_test |
|||
source ollama_test/bin/activate |
|||
python -m pip install ollama |
|||
export OLLAMA_HOST=localhost |
|||
and call <code>python</code> to run the following code: |
|||
import ollama |
|||
response = ollama.chat(model='deepseek-r1', messages=[ { 'role': 'user', 'content': 'why is the sky blue?'},]) |
|||
print(response) |
|||
You should now see DeepSeek's response regarding Rayleigh Scattering. |
|||
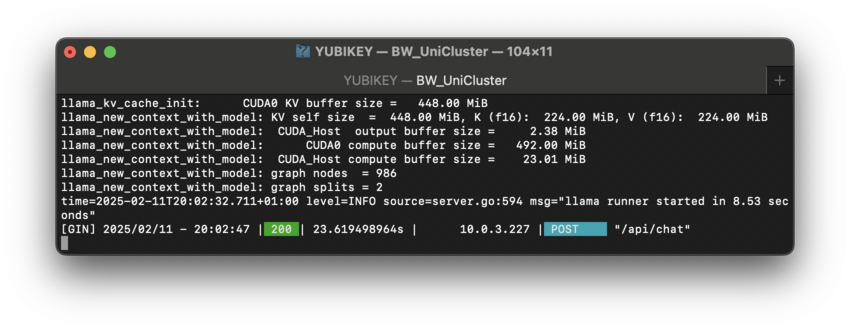
On the compute node, You will see the computation: |
|||
[[File:ollama_gpus_computing.png|850x329px]] |
|||
'''Enjoy!''' |
|||
== Best Practice == |
|||
Running interactively is generally '''not''' a good idea, especially not with very large models. Better submit Your job with mail notification, here file <code>ollama.slurm</code>: |
|||
#!/bin/bash |
|||
#SBATCH --partition=gpu_h100 # bwUniCluster3, for DACHS: gpu8 |
|||
#SBATCH --gres=gpu:h100:4 # bwUniCluster3, for DACHS: gpu:h100:8 |
|||
#SBATCH --ntasks-per-node=96 # considering bwUniCluster3 AMD EPYC9454, same on DACHS |
|||
#SBATCH --mem=500G # considering bwUniCluster3 768GB, enough on DACHS |
|||
#SBATCH --time=2:00:00 # Please be courteous to other users |
|||
#SBATCH --mail-type=BEGIN # Email when the job starts |
|||
#SBATCH --mail-user=my@mail.de # Your email address |
|||
module load cs/ollama # Load the the |
|||
export OLLAMA_HOST=0.0.0.0 # Serve on global interface |
|||
export OLLAMA_KEEP_ALIVE=-1 # Do not unload model (default is 5 minutes) |
|||
ollama serve |
|||
After starting the SSH for portforwarding or on the login-node after setting <code>export OLLAMA_HOST=</code> to the allocated node (see output of <code>squeue</code>): |
|||
ollama run deepseek-r1:671b |
|||
>>> /? # Shows the help |
|||
>>> /? shortcuts # Shows the keyboard shortcuts |
|||
>>> /show # Show information regarding model, prompt |
|||
>>> What is log(e)? # Returns explanation of logarithm under the assumption of base 10 and the natural logarithm including LaTeX Math notation. |
|||
Latest revision as of 17:37, 21 February 2025
Using LLMs even for inferencing requires large computational resources - currently at best a powerful GPU - as provided by the bwHPC clusters. This page explains to how to make usage of bwHPC resources, using Ollama as an example to show best practices at work.
Introduction
Ollama is an inferencing framework that provides access to a multitude of powerful, large models and allows performant access to a variety of accelerators, e.g. from CPUs using AVX-512 to APUs like the AMD MI-300A, as well as GPUs like multiple NVIDIA H100.
Installing the inference server Ollama by default assumes you have root permission to install the server globally for all users
into the directory /usr/local/bin. Of course, this is not sensible.
Therefore the clusters provide the Environment Modules including binaries and libraries for CPU (if available AVX-512), AMD ROCm (if available) and NVIDIA CUDA using:
module load cs/ollama
More information is available in Ollamas Github documentation page.
The inference server Ollama opens the well-known port 11434. The compute node's IP is on the internal network, e.g. 10.1.0.101, which is not visible to any outside computer like Your laptop. Therefore we need a way to forward this port on an IP visible to the outside, aka the login nodes.
|
Please note: this module started off in the Category |
Preparation
Prior to starting and pulling models, it is a good idea to allocate a proper Workspace for the (multi-gigabyte) models and create a soft-link into this directory for Ollama:
ws_allocate ollama_models 60
ln -s `ws_find ollama_models`/ ~/.ollama
Now we may allocate a compute node using Slurm. At first You may start with interactively checking out the method in one terminal:
srun --time=00:30:00 --gres=gpu:1 --pty /bin/bash
Please note that on bwUniCluster, You need to provide a partition, here containing a GPU, e.g. for this 30 minute run, we may select --partition=dev_gpu_4, on DACHS --partition=gpu1.
Your Shell's prompt will list the node's name, e.g. on bwUniCluster node uc2n520:
[USERNAME@uc2n520 ~]$
Now You may load the Ollama module and start the server on the compute node and make sure using OLLAMA_HOST that it serves to the external IP address:
module load cs/ollama
export OLLAMA_HOST=0.0.0.0:11434
ollama serve
You should be able to see the usage of the accelerator:
Accessing from login nodes
From another terminal You may log into the Cluster's login node a second time and pull a LLM (please check [1] for available models):
module load cs/ollama
export OLLAMA_HOST=uc2n520
ollama pull deepseek-r1
On the previous terminal on the compute node, You should see the model being downloaded and installed into the workspace. Of course developing on the login nodes is not viable, therefore You may want to forward the ports.
|
On GPUs with 48GB VRAM like NVIDIA L40S, you may want to use the 70b model of Deepseek, i.e. |
Port forwarding
The login nodes of course have externally visible IP addresses, e.g. bwunicluster.scc.kit.edu which get to resolved to one of the multiple login nodes.
Using the Secure shell ssh one may forward a port from the login node to the compute node.
Of course, You may want to locally on Your laptop. Open another terminal and start the Secure shell using the port forwarding:
ssh -L 11434:uc2n520:11434 USERNAME@bwunicluster.scc.kit.edu
Your OTP: 123456
Password:
You may check using whether this worked using Your local browser on Your Laptop:
Local programming
Now that You made sure You have access to the compute nodes GPU, you may develop on your local system:
python -m venv ollama_test
source ollama_test/bin/activate
python -m pip install ollama
export OLLAMA_HOST=localhost
and call python to run the following code:
import ollama
response = ollama.chat(model='deepseek-r1', messages=[ { 'role': 'user', 'content': 'why is the sky blue?'},])
print(response)
You should now see DeepSeek's response regarding Rayleigh Scattering.
On the compute node, You will see the computation:
Enjoy!
Best Practice
Running interactively is generally not a good idea, especially not with very large models. Better submit Your job with mail notification, here file ollama.slurm:
#!/bin/bash
#SBATCH --partition=gpu_h100     # bwUniCluster3, for DACHS: gpu8
#SBATCH --gres=gpu:h100:4        # bwUniCluster3, for DACHS: gpu:h100:8
#SBATCH --ntasks-per-node=96     # considering bwUniCluster3 AMD EPYC9454, same on DACHS
#SBATCH --mem=500G               # considering bwUniCluster3 768GB, enough on DACHS
#SBATCH --time=2:00:00           # Please be courteous to other users
#SBATCH --mail-type=BEGIN        # Email when the job starts
#SBATCH --mail-user=my@mail.de   # Your email address

module load cs/ollama            # Load the the
export OLLAMA_HOST=0.0.0.0       # Serve on global interface
export OLLAMA_KEEP_ALIVE=-1      # Do not unload model (default is 5 minutes)
ollama serve
After starting the SSH for portforwarding or on the login-node after setting export OLLAMA_HOST= to the allocated node (see output of squeue):
ollama run deepseek-r1:671b
>>> /?              # Shows the help
>>> /? shortcuts    # Shows the keyboard shortcuts
>>> /show           # Show information regarding model, prompt
>>> What is log(e)? # Returns explanation of logarithm under the assumption of base 10 and the natural logarithm including LaTeX Math notation.


