Registration/bwForCluster/NEMO: Difference between revisions
| Line 20: | Line 20: | ||
== Registering for Service bwForCluster NEMO == |
== Registering for Service bwForCluster NEMO == |
||
'''After having completed steps A+B''' please visit the '''[https://bwservices.uni-freiburg.de bwForCluster NEMO registration page]'''. |
[[https://wiki.bwhpc.de/e/Registration/bwForCluster|'''After having completed steps A+B''']] please visit the '''[https://bwservices.uni-freiburg.de bwForCluster NEMO registration page]'''. |
||
Do the following steps to complete registration: |
Do the following steps to complete registration: |
||
| Line 62: | Line 62: | ||
You can close the page for the registration server. |
You can close the page for the registration server. |
||
However, to be able to access NEMO interactively via SSH, you must also carry out the following steps. |
However, to be able to access NEMO interactively via SSH, you must also carry out the following steps. |
||
== Registering a Second Factor == |
== Registering a Second Factor == |
||
Revision as of 18:26, 17 November 2023
Registration at the bwForCluster NEMO
|
You can return to the registration website at any time, in order to review your registration details, change/reset your service password or de-register from the service by yourself. |
NEMO still uses the old registration page https://bwservices.uni-freiburg.de/, while NEMO2 will use the new registration page https://login.bwidm.de/. The security feature "One-time Password" (OTP), which is used as a second factor (2FA), is only available on the new registration page. Therefore, we unfortunately have to use both registration servers to get more security. The registration and setting of the service password must still be done via the old registration service, the OTP must be registered on the new registration page.
The registration process consists of two steps:
Registering for Service bwForCluster NEMO
[After having completed steps A+B] please visit the bwForCluster NEMO registration page.
Do the following steps to complete registration:
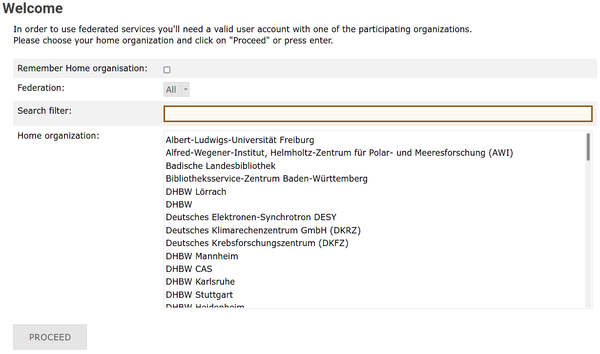
1. Select your home organization from the list on the main page and click Proceed or Fortfahren.
2. You will be directed to the Identity Provider of your home organization. Enter the username and password of your home organization (usually these credentials are also used for other services like email) and click Login/Einloggen.
3. You will be redirected back to the registration page https://bwservices.uni-freiburg.de. When you log in to bwServices for the first time, an overview will appear, with the account information that your home institution submits to the system. Please verify that all data is valid and then click Continue/Weiter.
4. After you have successfully logged into the bwServices, you will be greeted by a welcome screen that displays all the statewide services you have access to. There you will find a field labeled bwForCluster NEMO. Click Register/Registrieren to start the registration process.
|
If you do not meet all the necessary requirements for a service, this will be shown on the registry page. In this case please contact the service desk of your home organisation. In some cases further information is given and should be executed or provided in your support ticket. |
6. Read the Terms of Use (Nutzungsbedingungen und -richtlinien), place a check mark next to I have read and accepted the terms of use and click Register/Registrieren.
7. Set a service password for NEMO by clicking Set Password/Dienstpasswort setzen. Be sure to use a secure password that is different from any other passwords you currently use or have used on other systems and click Save/Speichern.
|
Setting a service password is mandatory for access to any bwForCluster. |
You have now completed the registration for NEMO. You can close the page for the registration server. However, to be able to access NEMO interactively via SSH, you must also carry out the following steps.
Registering a Second Factor
|
To improve security a 2-factor authentication mechanism (2FA) is being enforced for logins to NEMO. In addition to the service password or SSH key a second value, the second factor, has to be entered on every login.
If you only have a mobile device, you can use software-based solutions as a second factor. If you don't want to use a smartphone app, we recommend using a hardware token such as Yubikey. The Pros and Cons of the various solutions can be found in the generic Second Factor Wiki.
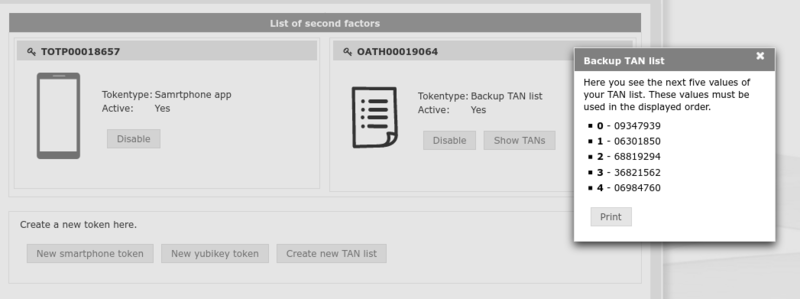
bwForCluster NEMO Tokens are generally managed via the Index -> My Tokens menu entry on the new registration page. Here you can register, activate, deactivate and delete tokens.
To activate the second factor, please perform the following steps:
1. Visit the registration server for the second factor for NEMO (KIT members can reuse their existing hardware and software tokens)
2. You will be directed to the Identity Provider of your home organization. Enter the username and password of your home organization (usually these credentials are also used for other services like email) and click Login/Einloggen.
3. You will be redirected back to the registration page https://login.bwidm.de/user/twofa.xhtml. When you log in to login.bwidm.de for the first time, an overview will appear, with the account information that your home institution submits to the system. Please verify that all data is valid and then click Continue/Weiter.
4. Register a new "Smartphone Token".
|
If you own a Yubikey and would like to register a Yubikey token, visit the generic Second Factor Wiki. |
5. Register a new "TAN List" (backup TAN list).
Registering a new Software Token using a Mobile APP
|
Please disable all privacy tools, ad blockers and further add-ons when registering new tokens. |
If you want to know how the "Time-based OTP" (TOTP) works or need a TOTP app, please visit the general Second Factor Wiki.
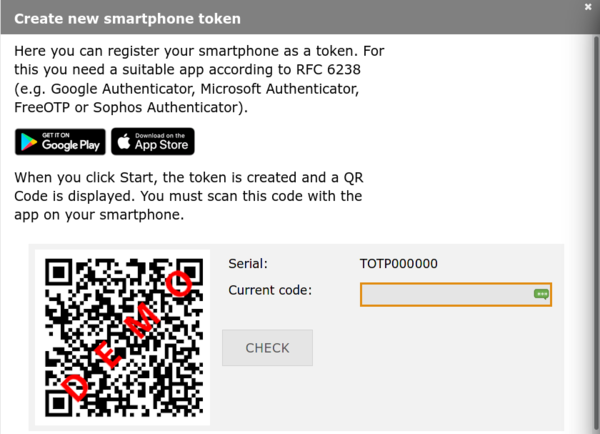
1. Registering a new Token starts with a click NEW SMARTPHONE TOKEN.
2. A new window opens. Click Start to generate a new QR code. This may take a while.
|
The QR code contains a key which has to remain secret. Only use the QR code to link your software token app with bwIDM/bwServices in the next step. Do not save the QR code, print it out or share it with someone else. |
3. Start the software token app on your separate device and scan the QR code. The exact process is a little bit different in every app, but is usually started by pressing on a button with a plus (+) sign or an icon of a QR code.
4. Once the QR code has been loaded into your Software Token app there should be a new entry called bwIDM (bwUniCluster, JUSTUS 2 and NEMO) or bwServices (Helix). Generate an One-Time-Password by pressing on this entry or selecting the appropriate button/menu item. You will receive a six-digit code. Enter this code into the field labeled "Current code:" in your bwIDM browser window to prove that the connection has worked and then click CHECK.
|
If you do not confirm the token by entering the six-digit code in the "Current code:" field, the token will NOT be initialized! |
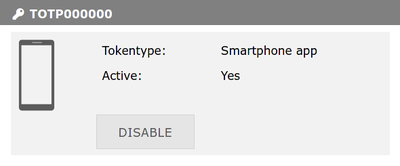
5. If everything worked as expected, you will be returned to the My Tokens screen and there will be a new entry for your software token.
6. Repeat the process to register additional tokens. Please register at least the "Backup TAN list" in addition to the hardware/software token you plan to use regularly.
Backup TAN List
|
Passwords from the "Backup TAN list" should only be used if no other token is left. Please do not use the Backup TANs for regular cluster login, because you have only a limited number of TANs. Each TAN can only be used once. Please disable all privacy tools, ad blockers and further add-ons when registering a new Backup TAN list. |
1. Select the registration server of the cluster for which you want to create a second factor and login to it.
2. Please create at least one "Backup TAN list" by clicking CREATE NEW TAN LIST.
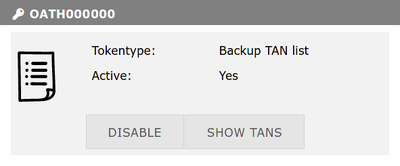
3. Click START. You will be redirected to the My Tokens screen and there will be a new entry for your backup TANs.
4. Click SHOW TANS, print the codes and keep then in a separate place for emergencies.
